Roles and permissions
Build custom roles from privileges, give a role to a user or group on an object, check who has access and remove a permission.
A role is a set of privileges, and a permission gives a role to a user or a group on one object. Creating and changing roles needs Authorization.ModifyRoles; giving or removing a permission needs Authorization.ModifyPermissions on the object. Everyone can read the roles. Identity concepts explains how the permissions of an object and of its parents combine.
In the console
Create a custom role
Open the User menu at the top right, select Administration, and in the list on the left select Roles.
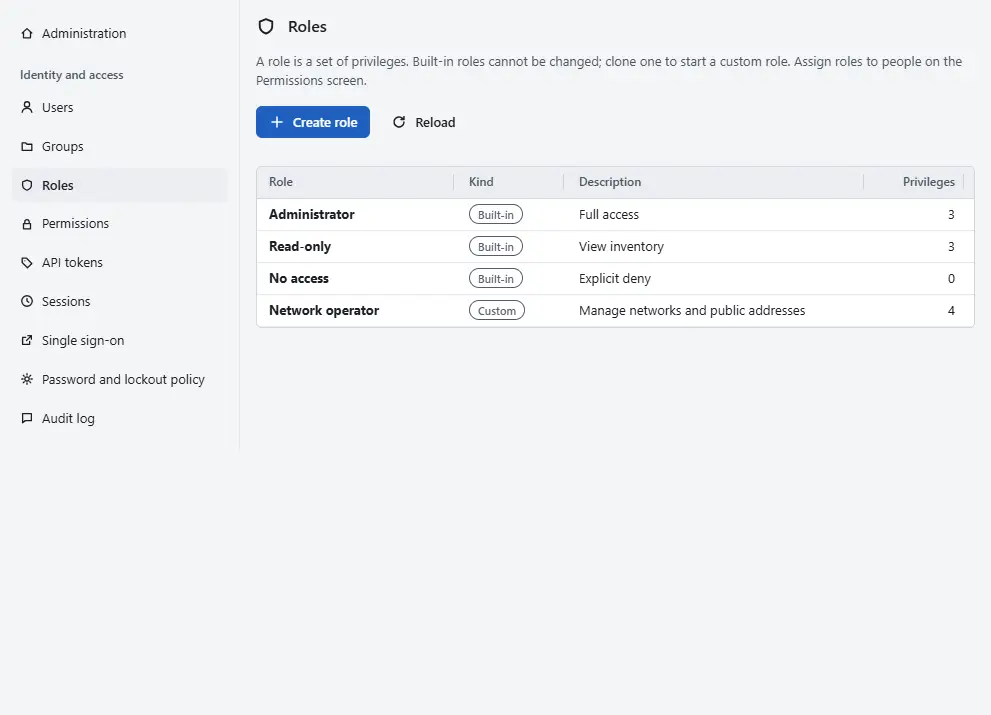
The table shows each role with its Kind, Built-in or Custom, and the number of privileges. A built-in role cannot be changed: View shows it, and Clone starts a custom role from a copy.
- Select Create role, or Clone in the row of a role that is close to what you need.
- Enter the Role name, which no other role uses, and a Description.
Tick the privileges. They are grouped by category, and All privileges of ... ticks a whole category. Filter privileges narrows the list by name or description. A new role starts with the three basic read privileges ticked.
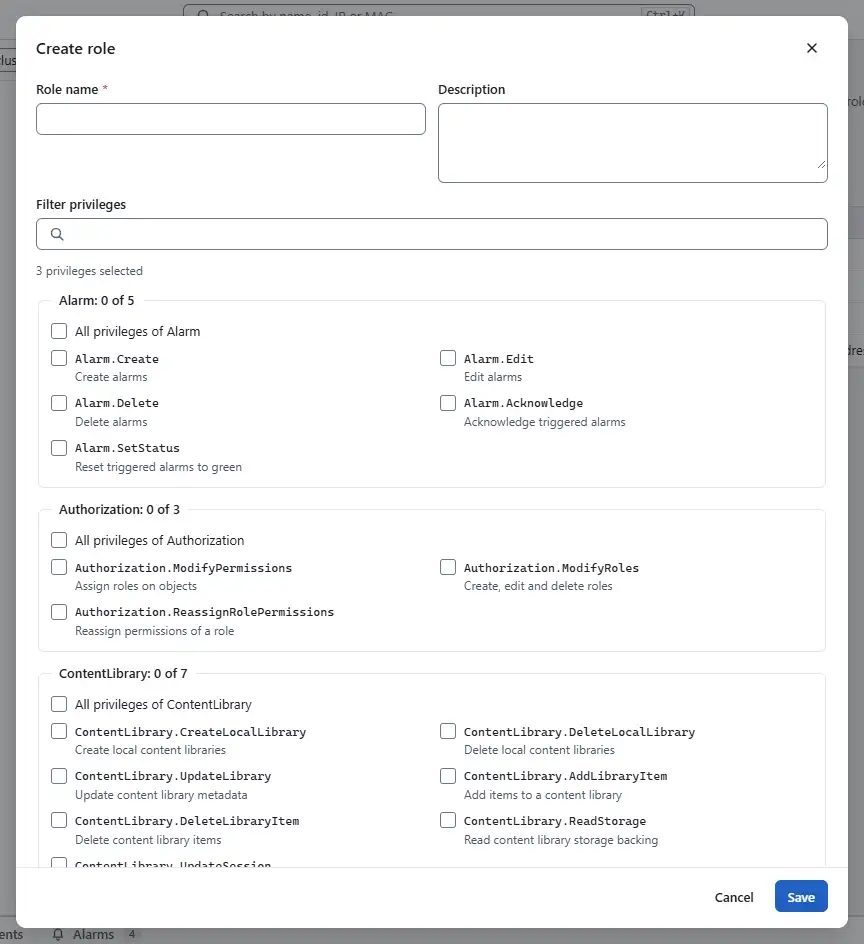
- Select Save.


Edit changes a custom role, and Delete removes it after you type its name. Deleting a role also removes every permission that uses it, so the people who held it lose that access.
Give a role to a user or group
- In the list on the left, select Permissions.
- Under Object, choose the view of the inventory, then select the object in the tree. The top entry, Management domain, covers everything.
The list Permissions on ... shows who holds which role. Applies to says whether the role applies to this object only or to everything below it, and Defined on says whether the permission is set here or inherited. Inherited permissions are changed on the object they come from.
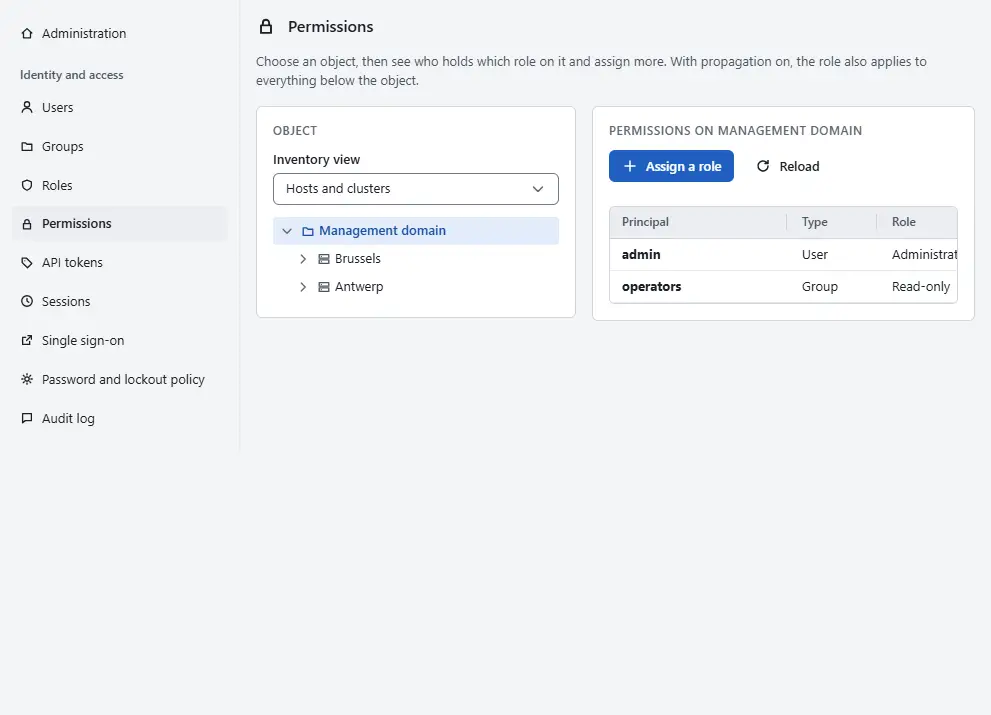
- Select Assign a role.
- Choose the Principal type, user or group, and search for the User or group name. Choose the Role; the dialog shows how many privileges it holds.
Leave Propagate to child objects ticked when the role must also apply to every object below this one. Clear it to limit the role to this object.
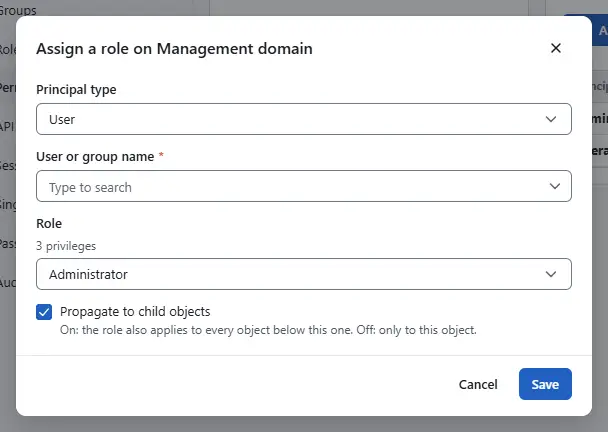
- Select Save.


Edit in a row changes the role or the propagation. Remove withdraws the permission; permissions set on other objects stay. A principal has one permission per object. A change applies to new sessions at once.
Permissions from an object
Every object of the inventory has the tab Permissions. It lists the permissions of that object in the same way and lets you add one with Add permission, so you can work from the object instead of from the people.

A role that holds the provider-only firewall privileges cannot be granted on an object inside a tenant; the dialog then shows error.identity.provider_privilege_in_tenant. A tenant user can receive roles only inside the folders and resource groups of the tenant.
Result
The principal has the role on the object, and on the objects below it when propagation is on. The change is in the audit log.
Automation
With the CLI
kyvernon privileges list
kyvernon roles create network-operator --description "Change networks and assign them" \
  --privilege Network.Config --privilege Network.Assign
kyvernon permissions set <entity> j.smith --role <role-id>
kyvernon permissions list <entity>
<entity> is the id of the object; group-d1 is the root folder. Add --group for a group and --no-propagate to limit the role to the object. kyvernon privileges check <entity> <privilege> tells whether you hold a privilege on an object.
With the API
POST /v1/identity/roles creates a role with name, description and privileges; PUT and DELETE /v1/identity/roles/{id} change and remove it. PUT /v1/identity/permissions sets a permission with entityId, principal, roleId and propagate, and DELETE /v1/identity/permissions/{id} removes one.
Related
- Built-in roles and Privileges list every role and privilege.
- Users and groups creates the principals.
Version 0.1. Last changed: 2026-11-14